 or large
  size, and you can add or remove buttons when needed.
| About the Navigation Bar |
| Adding or Removing Buttons in the Navigation Pane |
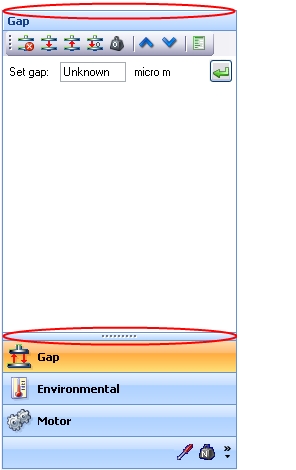
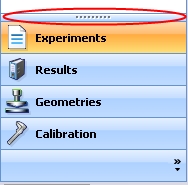
| Resizing the Pane |
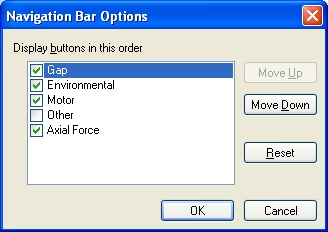
| Changing the View Button Display Order |
| Alternating Between Large and Small View Buttons |
The File Manager and Control panel both use a navigation bar to display and customize their panels. The view buttons and commands on the navigation bar correspond to the different views on the navigation pane, such as Last point, Gap, Auto Sampler, and Motor (in the case of the Control panel), and Experiments, Results, Calibration, and Geometry (in the case of the File Manager). Depending on the chosen view, a different set of panes, folders, and information displays. For example, you can display the view buttons in a small or large size, and you can add or remove buttons when needed.
The image below points out the different sections of the navigation pane (Control panel shown).
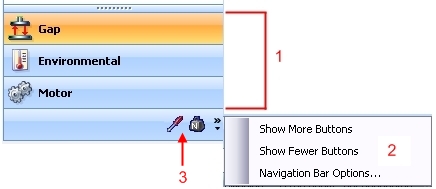
1 – Navigation pane
2 – Commands for changing the navigation pane's appearance
3 – Navigation bar
There are multiple ways to add or remove buttons in the File Manager navigation pane. On the navigation bar, click Configure Buttons  . Then use either of the following methods:
To add or remove buttons in the Control panel navigation pane:
.
To increase space in the Control panel or File Manager pane quickly, you can change from large buttons that are displayed vertically on the navigation pane to small buttons that are displayed horizontally across the navigation bar.
To resize the pane vertically:
To change the order in which the view buttons display on the navigation pane:
.
To change a large view button on the navigation pane to a small icon on the navigation bar (and vice versa):
On the navigation bar, click Configure Buttons .
To quickly see more buttons or folders, use the horizontal splitter bar to resize the navigation pane. See Resizing the Pane for more information.
